前言
Input Manager 是 Unity 舊有的輸入系統,開發者需要在 Update 中撰寫一系列的 IF 判斷式來檢測玩家是否有點擊指定按鍵,碰到需要跨平台或跨裝置的情境時往往會讓程式碼變得複雜,而 Input System 的推出很好的解決了這個問題。
 來源:
來源:Input System 提供了一個控制介面讓開發者設定需要偵測的輸入行為,有幾個重點觀念必須先了解:
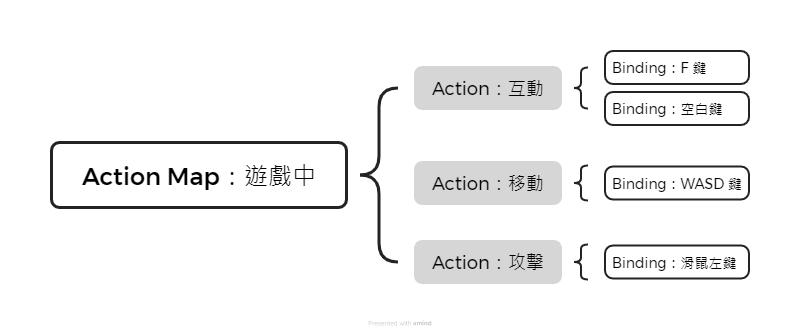
- Control Scheme:可根據不同的輸入裝置來監聽不同的行為,假設玩家連接的是鍵盤就監聽空白鍵、Xbox 手把就監聽 A 鍵。
- Action Map:可根據不同的情境套來監聽一系列不同的行為,假設在選單頁面時就只監聽滑鼠、在遊戲中監聽 WASD、 F 或空白鍵。
- Action:遊戲的輸入事件,例如:移動、跳躍、攻擊或防禦等。
- Binding:要監聽的輸入來源,也就是鍵盤滑鼠的位置、按鍵或搖桿等裝置的輸入。
一個 Action Map 下通常會有多種 Action,Action 下也有可能會監聽多種輸入來源。舉例來說,當我在監聽遊戲中的輸入行為時,會需要一個 Action Map 來涵蓋玩家的移動、跳躍、互動、攻擊等 Action,並且在互動的 Action 下設定 F 與空白鍵來讓玩家可以自由使用兩種輸入方式。
以往要實作讓「互動」可以同時用 F 和空白鍵的腳本時,通常會在 Update 中用 IF 的 OR 條件來實現。而現在的 Input System 已經處理好這一塊的判斷,我們只要監聽「互動」事件即可,不用在程式碼中管理按鍵種類的事情。
啟用 Input System
設定 Project Settings
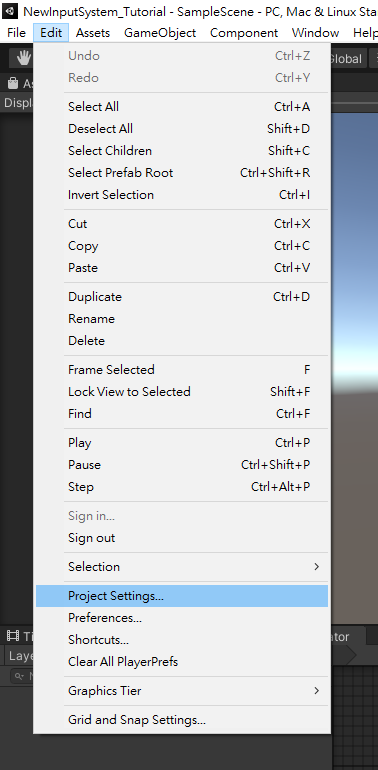
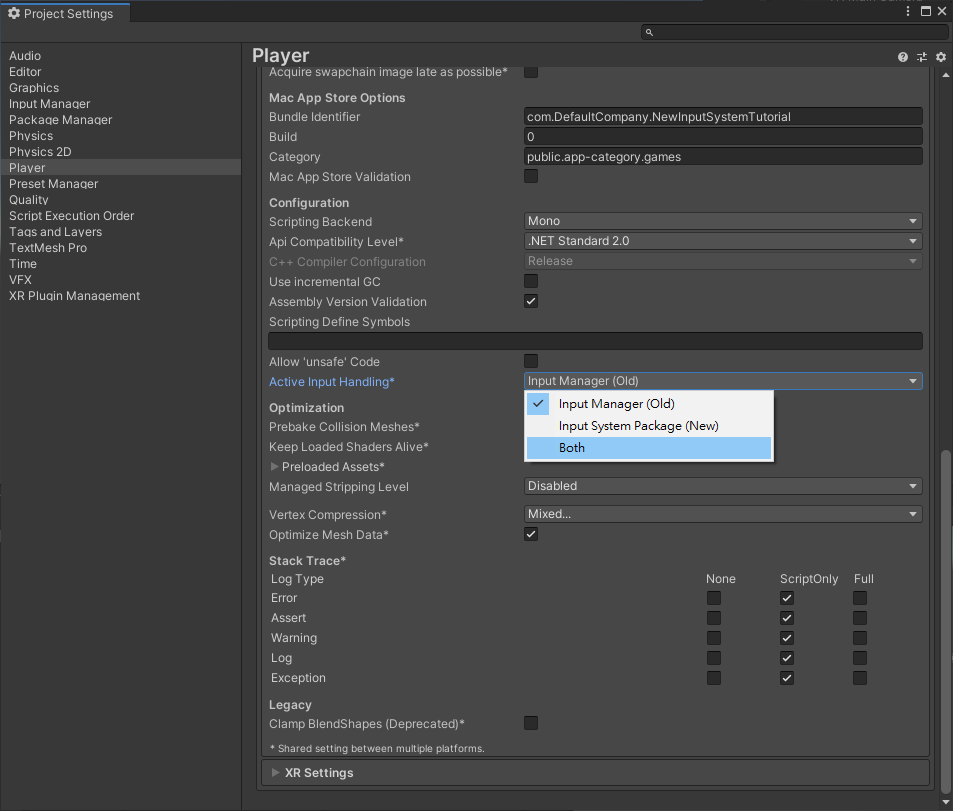
首先,從 Editor 開啟 Project Settings,並切換到 Player 頁面。
往下滑,將 Active Input Handling 改成 Input System Package 或 Both,如果新舊版都會用到的話就選擇 Both。
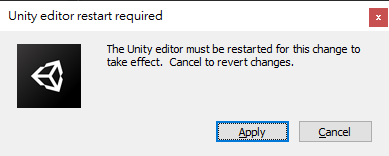
修改後要讓編輯器重開。
安裝 Input System
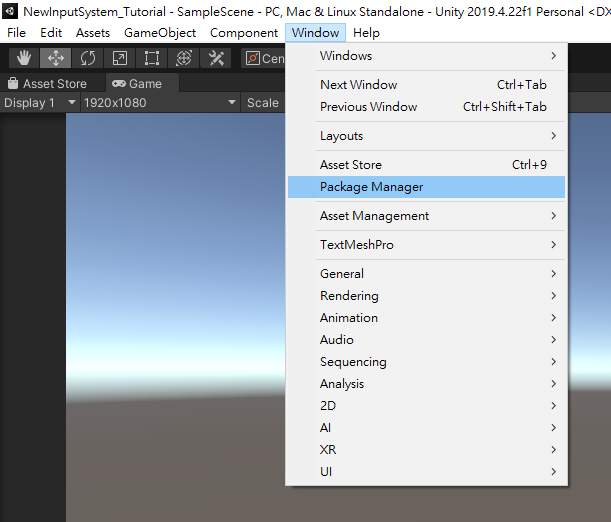
從 Window 開啟 Package Manager。
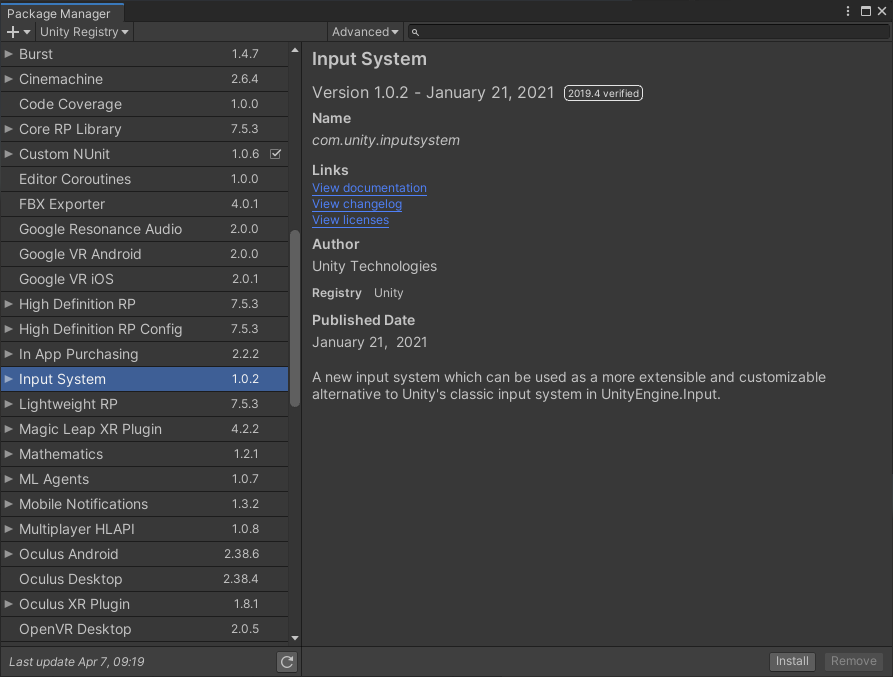
左上角切換到 Unity Registry 後,找到 Input System 後安裝。
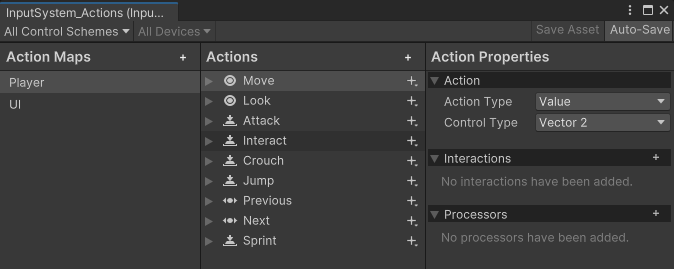
建立 Input Action
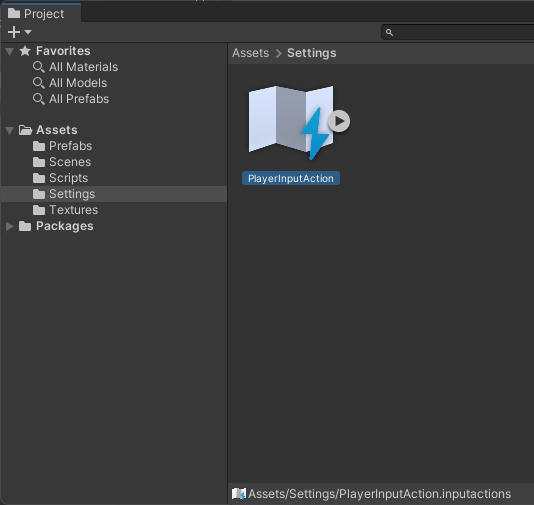
首先於 Asset 下建立 Settings 資料夾,再點擊滑鼠右鍵 > Create > Input Actions 建立名為 PlayerInputAction 的設定檔。
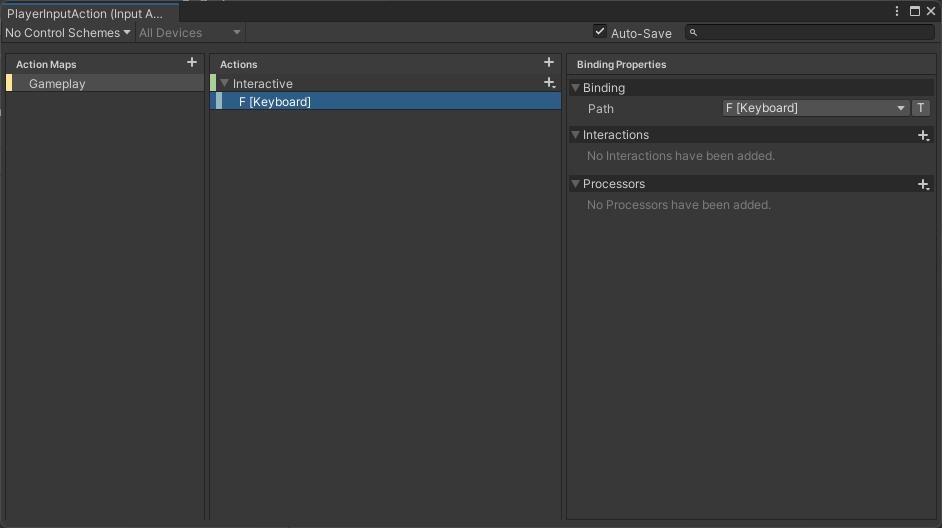
接下來雙點擊 PlayerInputAction 開啟控制面板,來建立玩家於遊戲中的互動按鍵設定:
- 先勾選上方的 Auto-Save 啟用自動儲存。
- 點擊 Action Maps 右上角的 + 建立名為「Gameplay」的 Action Map。
- 於 Gameplay 下建立一個名為「Interactive」的 Action,用來偵測玩家是否按下遊戲中的互動鍵。
- 剛新增的 Interactive 下會有一個叫做 No Binding 的項目,選取它並於右側的 Binding Properties 中的 Path 選擇 Keyboard 的 F 鍵。
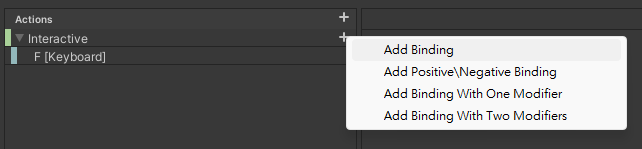
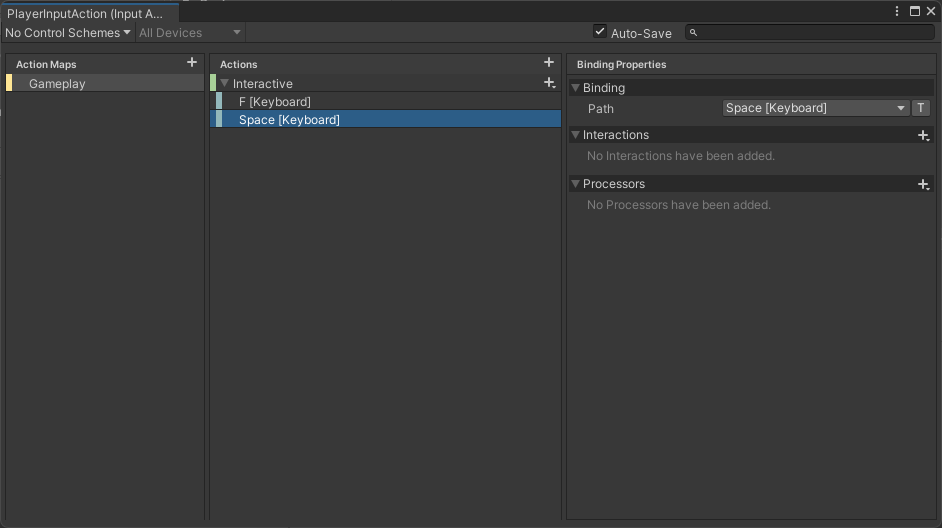
由於我們希望互動鍵能用 F 和空白鍵來觸發,因此要點擊 Interactive 旁邊的 + > Add Binding 來建立第二個 Binding,並用與設定 F 相同的方法來設定空白鍵。
建立 PlayerController
建立 C# 腳本
我們要來建立一個 C# 腳本,用來撰寫當接收到玩家的輸入時要執行的程式:
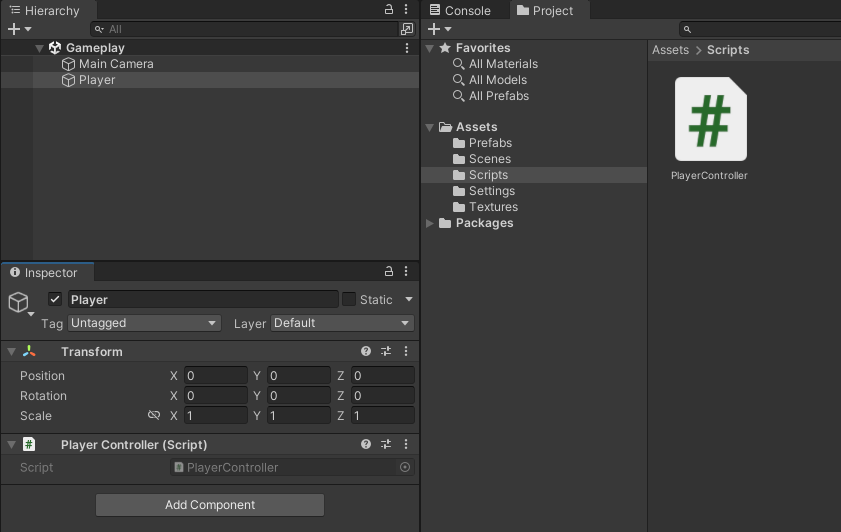
- 於場景中建立 Player 空物件。
- 於 Assets 下建立 Scripts 資料夾。
- 於 Scripts 建立名為 PlayerController 的 C# 腳本。
- 將 PlayerController 作為元件新增至 Player 中。
新增 Player Input 元件
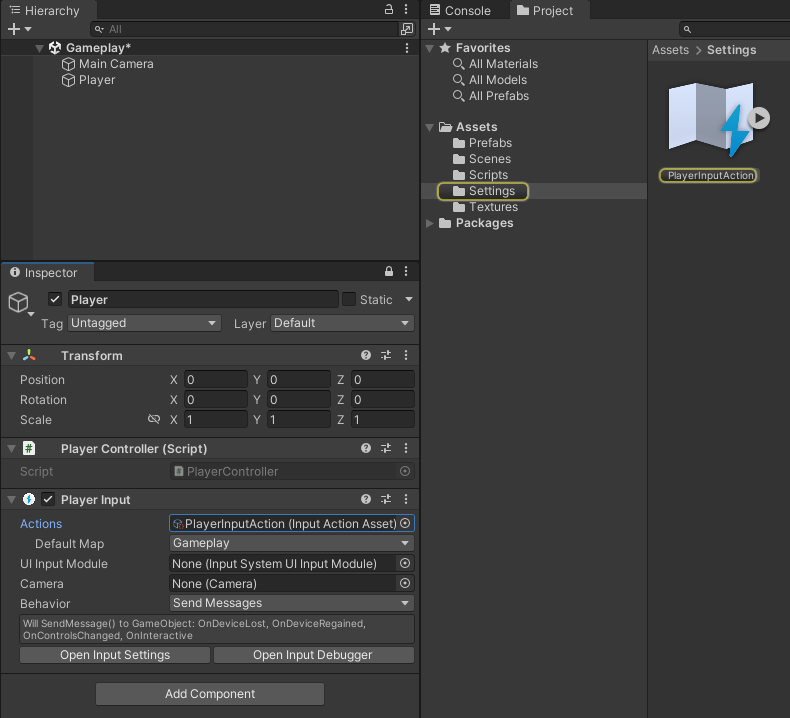
接著在 Player 下新增 Player Input 元件,並拖曳 PlayerInputAction 到 Player Input 的 Actions 中。
撰寫 C# 腳本
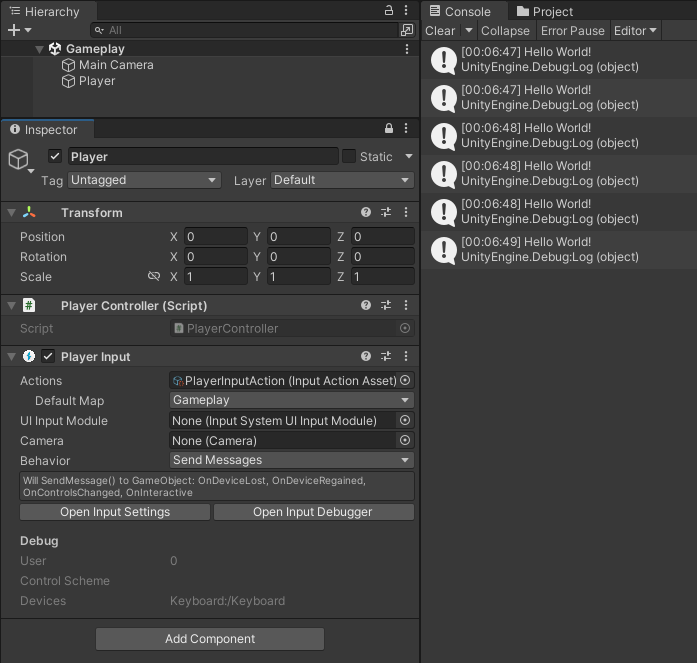
先仔細觀察 Player Input 中的說明,可以看到「Will SendMessage() to GameObject: OnDeviceLost…OnInteractive」的文字,其中 OnInteractive 就是我們要接收玩家輸入「互動」的方法。
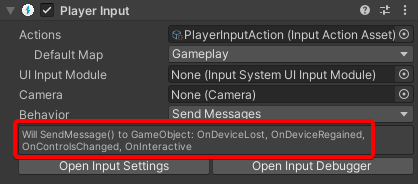
Player Input 預設會通過 Unity Message 來觸發同物件下的腳本內容,因此我們可在 PlayerController 中撰寫與 OnInteractive 同名的方法來接收輸入事件。
1using UnityEngine;
2
3public class PlayerController : MonoBehaviour
4{
5    private void OnInteractive()
6    {
7        Debug.Log("Hello World!");
8    }
9}
功能測試
執行 Unity 專案,當我們按下 F 或空白鍵時,將會於 Console 中印出 Hello World! 訊息,最基礎的按鍵互動程式即完成。